If you want to know How To Install WordPress on Hostinger then you are at the right place.
In this article, we are going to show you a step-by-step guide on installing WordPress in your Hostinger server without any hassle.
Most beginners find WordPress installation difficult but feature such as Auto Installer and Softaculous make this process fast and easy.
Do you know? Hostinger offers an auto-installer tool that enables you to install WordPress in just a few clicks, so you don’t have to deal with any technical parts.
Many hosting companies offer WordPress websites, and you can set them up, but not all of them offer good service at an affordable price.
Therefore, the best web host to create and host your WordPress blog is Hostinger. They offer affordable pricing, reliable security, as well as great customer service. It’s hard to find a service like Hostinger anywhere else if you have a tight budget.
Let’s move on to the step-by-step guide of installing WordPress on Hostinger.
How to Install WordPress on Hostinger with Auto Installer
Getting back to the main content of this article, that is how to install WordPress on Hostinger.
The first step in getting started with a WordPress installation on Hostinger is to get a web hosting plan.
As soon as you have purchased Hostinger hosting, make sure you have the password and login ID to access their hPanel.
Note: If you are interested in purchasing Hostinger, use this Exclusive link and apply the promo code “BLOGGERSDESIRE” to get an additional discount.
If you already purchased their hosting plans then you can skip to step 5 directly otherwise all the steps are important to install WordPress on Hostinger.
Now here are the steps to follow:
Step 1: Visit Hostinger
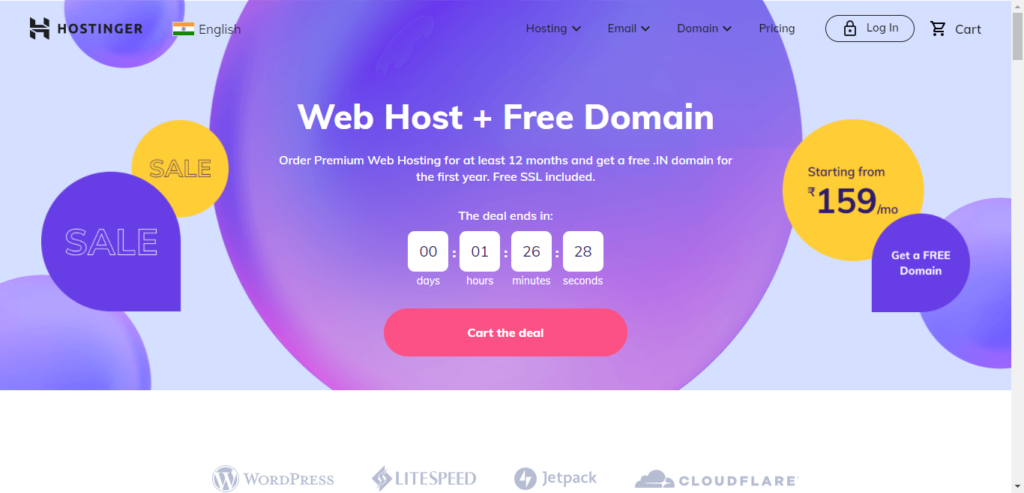
The first step is to open the Hostinger official website, click on this link that will lead you to the Hostinger official website homepage which may look like this.
Step 2: Choose Web Hosting Plan
Once you open the link, you will land on this page where you need to select the web hosting plan for your business.
Hostinger offers three shared hosting plans which are as follow:

1. Single Shared Hosting (₹69/mo): This plan is best for beginners. Here are the features you will get in this plan.
Features Included:
2. Premium Shared Hosting (₹149/mo): This is Hostinger’s most popular web hosting plan, this plan is best for personal websites.
Features Included:
3. Business Shared Hosting (₹279/mo): This plan is optimized for small businesses, if you are a business owner then you should go with this plan.
Features Included:
The Single Shared plan is the best option for those who are just starting out with one website. But you can also choose any plan that suits your needs.
NOTE: All the prices shown above apply only if you select the 48-month billing period.
Step 3: Select Period
Now you have to choose a billing period you want to sign up for. You will get 4 options;
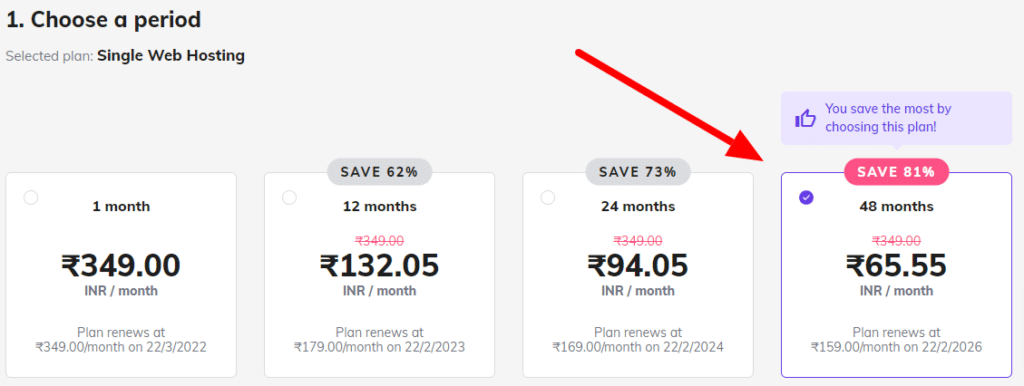
- 48 Months plan will costs you ₹ 3712
- 24 Months plan will be billed at ₹ 2663
- 12 Months plan brings the cost to ₹ 1869
- 1 Month plan cost you subtotal: ₹ 411
Note: If you want to save huge on the Hostinger hosting plan then I recommend you to go with the 48 Months plan because with this plan you will get the best deal.
Step 4: Checkout and Pay
This is the last step to begin the installation process of WordPress on your Hostinger account.
Now you have to create your account for Hostinger, select the payment methods, and fill in the payment details to buy the hosting plan.

You can use the coupon code “BLOGGERSDESIRE” to get an additional discount on your order.
We are now ready to move on to the most important step to install WordPress on Hostinger.
Read – Hostinger India Review: Speed Test + Benefits (Pros & Cons)
Step 5: Installing WordPress On Hostinger
Once you purchase a Hostinger hosting plan, you are only a few clicks away to install WordPress on your Hostinger server.
The Hostinger account comes with an Auto Installer, so for the installation, we will use the Auto Installer provided by Hostinger.
Open your new hosting account in Hostinger’s hPanel using the login information you received. Using your user name and password you just created, and the email you received after purchasing, log in to your account.
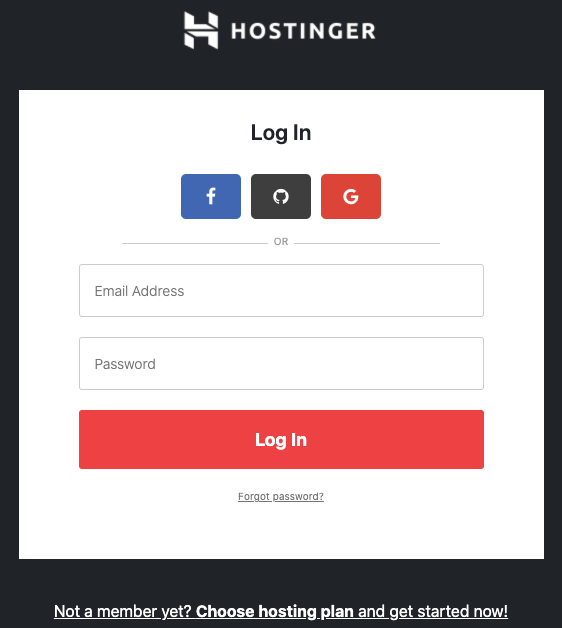
After clicking on that URL, you will be taken to the login screen which looks like this.
After the final payment, you will receive Hostinger’s confirmation email which you can use to log in with the credentials you just created during the signup process.
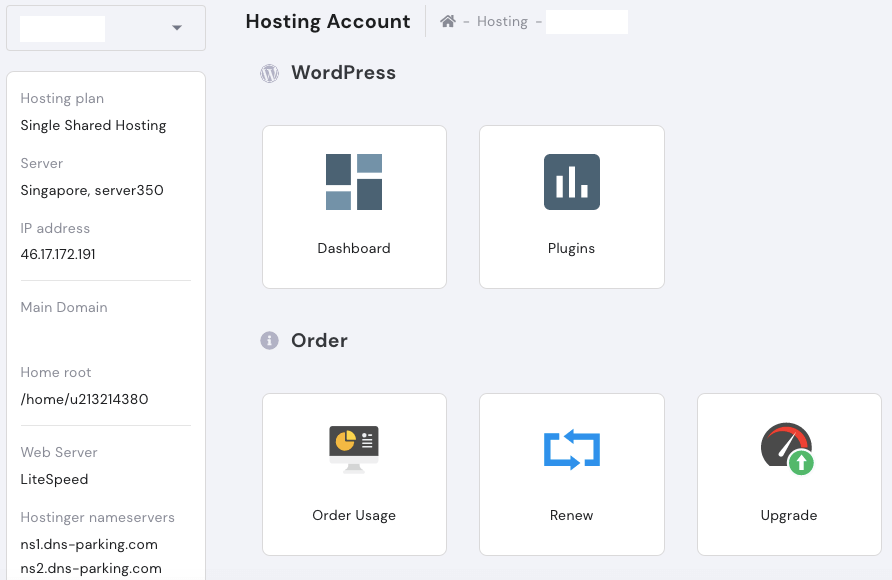
After logging in, you will be able to see a dashboard with details about your plan.

Once you click the Manage button, you will see the simple and powerful hPanel by Hostinger.
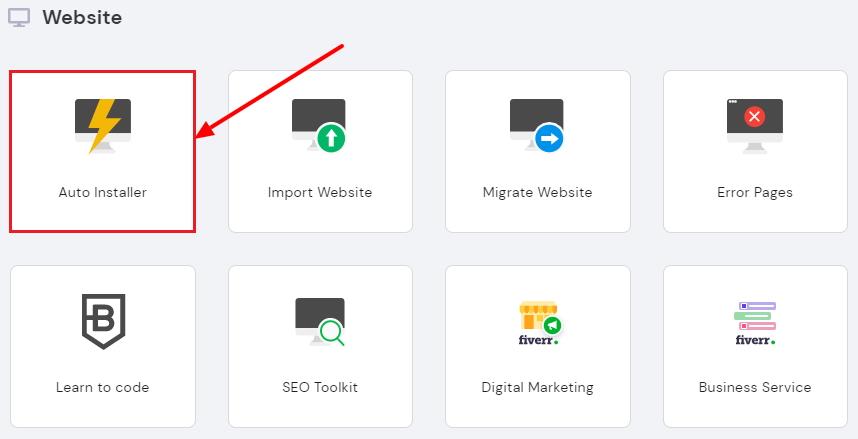
Scroll down until you see the Auto Installer option which is available in the website section.
Now select the WordPress CMS to install.

The next step is to fill out a simple WordPress details form. You have to fill in the following details:
- Configure administrator usernames, passwords, and email addresses for the WordPress dashboard
- Give the title of the website
- Choose a language that is relevant
- Enable automatic updates for the latest available version
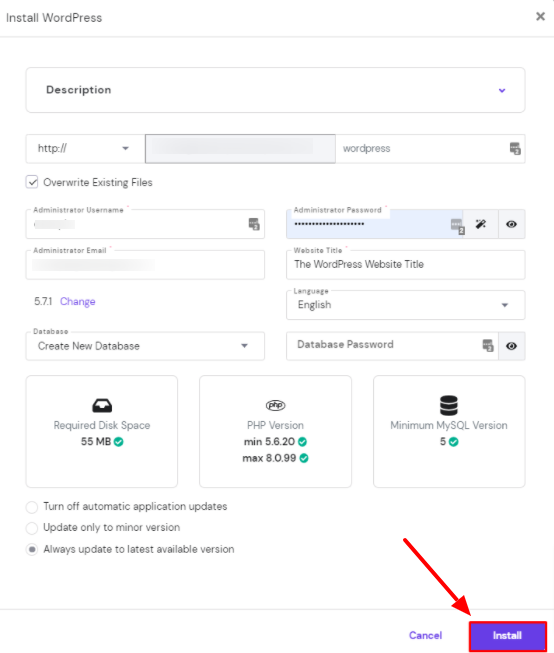
Once you fill in all the required fields, click on the Install button.
You can cross-check WordPress installation on your Hostinger account by going to Auto Installer – Installed Applications.

Click the three dots next to your WordPress URL as soon as it appears to see WordPress installed. Then click on the Edit to access your WordPress admin area.

In addition, once WordPress is successfully installed, you will also be notified by email with a login link. You will then be able to access the WordPress dashboard by clicking on this link.
You can also use the yourdomainname/wp-admin site to access your WordPress dashboard, where you can start customizing your website immediately.
It’s easy and simple to install WordPress on Hostinger, isn’t it? You’re now ready to get started creating & customizing your WordPress website.
You may wonder what WordPress is and why it has gained so much popularity. So, let’s look at that too.
What is WordPress?
WordPress is software that lets you publish content to the web very easily. It was launched in 2003 and now it is the most popular platform worldwide for building websites.
WordPress is released under the GNU Public License which means anyone can download and use it for free.
WordPress is known for its versatility. You can create blog sites, forums, directories, eCommerce stores, business websites, etc.
Around 41% of all internet websites today use WordPress, and that number is growing rapidly.
Why is WordPress so Popular?
Here are some of the top reasons why WordPress is so popular:
1. Free and Open Source Software
Free and open-source software is one of the most significant factors that have contributed to WordPress’ success. This simplifies the process of finding, using, editing, and distributing it.
2. Themes
Any CMS offers the benefit of allowing users to create a professionally designed website by just clicking a button. There are tons of themes available to design beautiful websites without any coding skills.
3. Plugins
As a core component of WordPress’ success (and the thing that made it the CMS it is now), plugins have constantly redefined its capabilities.
The majority of WordPress plugins operate independently, allowing users to pick and choose among them according to their own preferences.
4. Ease of Use
The existence of a single product designed for web design that is both powerful and simple to use is pretty rare. That’s exactly what WordPress is.
5. Gutenberg
Gutenberg is the new editor which was introduced in WordPress 5.0. It totally transformed the way of editing posts and pages and took the editing to the next level. It gives you greater control over your content’s visual aspect, introducing a new way of creating content.
WordPress now includes the block editor as the default content editor, replacing the classic editor.
Important Things You Should Do Immediately After Installing WordPress
1. Change Site Title, Tagline, and Timezone: It is necessary to change the name, tagline, and time zone settings for the site. Visit the Settings » General page to do so.
2. Install Google Analytics: By using MonsterInsights, you can easily install Google Analytics. This is the best Google Analytics plugin for WordPress that shows beautiful analytics reports within WordPress itself.
Also Read – MonsterInsights Review 2021: Is it Really Worth it?
3. Install Backup Plugin: Data loss causes millions of dollars in damages each year. A backup will ensure that if a disaster strikes, you can easily restore your website. You can use the UpdraftPlus plugin to take regular backups of your blog.
4. Website Security: WordPress comes with quite a few security features. For your website to remain safe, you should still adhere to security practices. Our recommendation is to use Sucuri. Virus protection, vulnerability scanning, and website security are their specialties.
5. Spam Protection: Comment spam can have quite a negative effect. Most of these spams contain links to malicious websites known to distribute malware. Your website’s ranking and reputation can suffer if spam comments appear.
These are the 5 important things you should do immediately after installing WordPress.
Also Read:-
Rank Math Review 2021 – An In-Depth Review & Comparison with Yoast SEO
14 Best Web Hosting Free Trials 2021: [No Credit Card Required]
FAQs: How to Install WordPress on Hostinger
Q1. How do I install WordPress on Hostinger?
Here are the steps to install WordPress on Hostinger:
Step 1: Open Hostinger’s website
Step 2: Select a web hosting plan and buy a plan.
Step 3: Log in to your hPanel.
Step 4: Find Auto-Installer.
Step 5: Find WordPress and Install.
Q2. Is WordPress free with Hostinger?
It’s a free and open-source CMS program, which lets you build static pages and dynamic websites with drag-and-drop functionality. Even a non-programmer can use WordPress to make a website. Hostinger doesn’t charge you for installing WordPress.
Q3. Is Hostinger good for WordPress?
The hosting provider uses LiteSpeed caching and advanced optimization to deliver the best WordPress experience possible.
Q4. Does Hostinger provide cPanel?
No, Hostinger’s own hPanel includes Auto-Installer that allows you to easily set up WordPress on your hosting account within a few clicks.
Summary
We are reaching the end of this article and it is time to conclude. This guide has covered the easiest method to install WordPress on Hostinger.
Throughout this guide, I’ve included step-by-step instructions for installing WordPress on a Hostinger account.
We hope you find this step-by-step guide to be informative and helpful as we walk you through it. We tried to make it as straightforward as possible.
After reading this article we hope that you now understand the importance of WordPress and that you can easily get started with it without a professional’s help.
If you have questions regarding this WordPress Installation guide on Hostinger, feel free to ask them below in the comments.





Amazing bro you have provided a well step by step guide.
Awesome explanation!!!!
Thanks
Thanks for sharing this information in-detail about the installation process WordPress on Hostinger